Python network sockets programming tutorial

Standard

The first computer network that implemented the Internet protocol was created in 1969. It was mainly used for projects in universities and research laboratories in the US. The network was named ARPANET. This network was the preprocessor of the modern Internet and the basis of modern computer networks.

In this tutorial you will learn about in network programming. You will learn about the client-server model that is in use for the World Wide Web, E-mail and many other applications.

The client server model is a model where there are n clients and one server. The clients make  data requests to a server. The server replies to those messages received. A client can be any device such as  your computer or tablet. Servers are generally dedicated computers which are to be connected 24/7.  Right in this moment your client is a web browser (Chrome,  Firefox or another) and a server gives you the pages.

A simple socket server in Python
This code will start a simple web server using sockets. It waits for a connection and if a connection is received it will output the bytes received.

Execute with:

This opens the web server at port 62. In a second screen, open a client with Telnet. If you use the same machine for the client and server use:

If you use another machine as client, type the according IP address of that machine. You can find it with ifconfig.

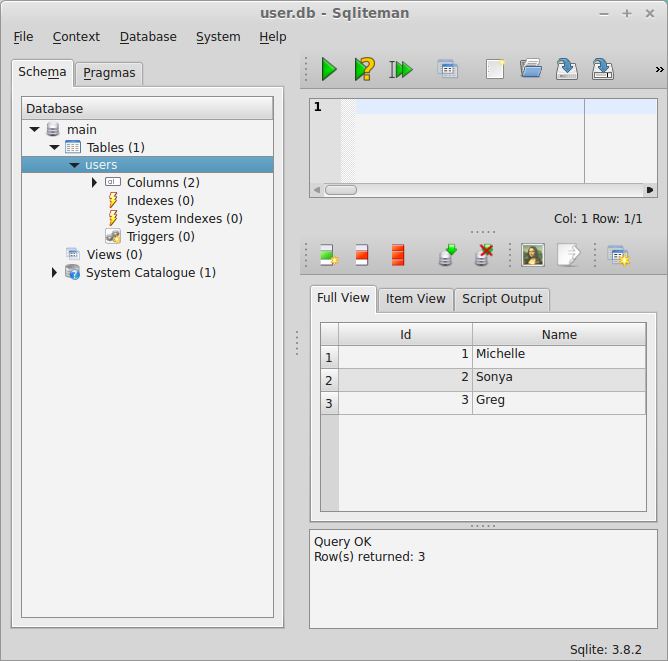
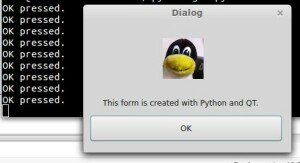
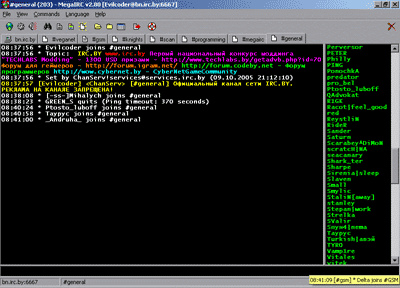
Everything you write from the client will arrive at the server. The server sends the received messages back. An example output below (Click to enlarge):

Servers connected to a network.

Creating a network client:
The client script below sends a message to the server. The server must be running!

This client simply mimics the behavior we did in Telnet.

Limitations of the server code
The server code above can only interact with one client.  If you try to connect with a second terminal it simply won’t reply to the new client. To let the server interact with multiple clients you need to use multi-threading. We rebuild the server script to accept multiple client connections:

Defining the application protocol
So far we have simply sent messages back and forth. Every message can have a specific meaning in an application. This is known as the protocol.  The meaning of these messages must be the same on both the sender and receiver side.  The Transport Layer below makes sure that messages are received (TCP). The Internet Layer is the IPv4 protocol.  All we have to define is the Application Layer.

Below we modified the server to accept simple commands (We use the non-threading server for simplicity). We changed the port to 64.  Server code with a protocol:

Run the server with:

A client can then connect with telnet (make sure you pick the right IP):

If you liked this tutorial please share it with the buttons below.

Python Database Programming: SQLite (tutorial)

Standard
sqlite

In this tutorial you will learn how to use the SQLite database management system with Python.  You will learn how to use SQLite, SQL queries, RDBMS and more of this cool stuff!

Data is everywhere and software applications use that. Data is either in memory, files or databases. One of these database management systems (DBMS) is called SQLite.  SQLite was created in the year 2000 for a missile control system (boom! did we say it was cool?) and is one of the many management systems in the database zoo. MySQL, Postregsql, Oracle, Microsoft SQL Server and Maria DB are other database animals in this zoo.  So what is this SQL?

SQL is a special-purpose programming language designed for managing data held in a databases. The language has been around since 1986 and is worth learning. The video below is an old funny video about SQL.

Why use SQLite? SQLite is the most widely deployed SQL database engine in the world. The source code for SQLite is in the public domain. It is a self-contained, serverless, zero-configuration, transactional SQL database engine. The SQLite project is sponsored by Bloomberg and Mozilla.

Installation:

Verify if it is correctly installed. Copy this program and save it as test1.py

Execute with:

It should output:

What did the script above do?
The script connected to a new database called test.db with this line:

It then queries the database management system with the command

which in turn returned its version number. That line is known as an SQL query.

SQL joke. From Reddit

SQL joke. Source: Reddit

Storing data
The script below will store data into a new database called user.db

SQLite is a database management system that uses tables. These tables can have relations with other tables: it’s called relational database management system or RDBMS.  The table defines the structure of the data and can hold the data.  A database can hold many different tables. The table gets created using the command:

We add  records into the table with these commands:

The first value is the ID. The second value is the name.  Once we run the script the data gets inserted into the database table Users:

table2

Exploring the data
We can explore the database using two methods:  the command line and a graphical interface.

From console: To explore using the command line type these commands:

This will output the data in the table Users.

From GUI: If you want to use a GUI instead, there is a lot of choice. Personally I picked sqllite-man but there are many others. We install using:

We start the application sqliteman. A gui pops up.

sqliteman

Press File > Open > user.db.  It appears like not much has changed, do not worry, this is just the user interface.  On the left is a small tree view, press Tables > users. The full table including all records will be showing now.

sqliteman2

This GUI can be used to modify the records (data) in the table and to add new tables.

 The SQL language
SQL has many commands to interact with the database. You can try the commands below from the command line or from the GUI:

We can use those queries in a Python program:

This will output all data in the Users table from the database:


SQL joke. Source: flickr

SQL joke. Source: flickr

Creating a user information database
We can structure our data across multiple tables. This keeps our data structured, fast and organized.  If we would have a single table to store everything, we would quickly have a big chaotic mess. What we will do is create multiple tables and use them in a combination. We create two tables:

Users:

t1

Jobs:

t2

To create these tables, you can do that by hand in the GUI or use the script below:

The jobs table has an extra parameter, Uid. We use that to connect the two tables in an SQL query:

You can incorporate that SQL query in a Python script:

It should output:

If you liked this tutorial please share it using one of the buttons below :)

Creating a webbrowser with Python and PyQT (tutorial)

Standard
browser

In this tutorial we will build a webbrowser with Python. We will use PyQT.  Install the required packages:

If you have not done our first tutorial, you could try it. If python-kde4 cannot be found update your repository to find it. If you are on Ubuntu or Debian Linux use this link.

Creating the UI with PyQT
Start qt4-designer from your applications menu. The QT Designer application will appear:

QT_Designer

QT_Designer

Select Main Window and press Create. We now have our designer window open.  Drag a KWebView component on the window. If you have a QtWebView in the component list. use that instead. We also add an Line Edit on top. Press File > Save As > browser.ui.  Run the command:

This will generate a Python file. Remove the line “from kwebview import KWebView” from the bottom of the browser.py file. Change KWebView to QtWebView. We want to use QtWebView instead. If you are lazy to change that, take the browser.py file from below.

Creating the logic.
Create a file called run.py with this contents:

This code will use the UI as defined in browser.py and add logic to it. The lines

The first line defines the callback or event. If a person presses enter (returnPressed), it will call the function loadURL. It makes sure that once you press enter, the page is loaded with that function. If you did everything correctly, you should be able to run the browser with the command:

Please make sure you type the full url, e.g.  : https://talkera.org including the http:// part.  Your browser should now start:

browser

If your code does not run, please use the codes below (or look at the differences and change whats wrong):

browser.py

run.py

Speech engines with Python (tutorial)

Standard
dog on the phone

A computer system used to create artificial speech is called a speech synthesizer, and can be implemented in software or hardware products. A text-to-speech (TTS) system converts normal language text into speech. How can we use speech synthesis in Python?

Pyttsx
Pyttsx is a cross-platform speech (Mac OSX, Windows, and Linux) library. You can set voice metadata such as age, gender, id, language and name.  Thee speech engine comes with a large amount of voices. Sadly, the default voice sounds very robotic.

Create the code speech1.py

And execute it with python.

Espeak
eSpeak is a compact open source software speech synthesizer for English and other languages, for Linux and Windows.  We can install using:

Create the code speech2.py:

It is very easy to use, but like pyttsx it sounds very robotic.

GoogleTTS
I found a script on Github that uses the Google speech engine.  The script comes with many options and does not speak, instead it saves to an mp3. We added a command to play the mp3 automatically:

Run with:

The voice is extremely natural. The only disadvantage is that you need to be connected with the Internet when running this script.

 Conclusion
GoogleTTS is the most natural speech synthesis engine that we found. While other TTS engines are simple to use they simply do not match the sound quality.  Sadly the number of available voices is limited.

QML and PyQT: Creating a GUI (tutorial)

Standard
qtquick2

If you have not done our first PyQT tutorial yet, you should do it, it’s fun! In this tutorial we will use an user interface markup language, a language that describes the graphical  user interfaces and controls .  An excerpt of user interface markup language code could look like:

Essentially the language tells what the interface should look like. The language we will be using is called QML. Do not worry about it for now.

Start a programmed called QTCreator.   The tutorial will be quite graphical to help you through the whole process. Simply type qtcreator in the terminal or start it from the menu list.  This screen should pop up:

qtcreator

Press the big New Project button. Select QT Quick Application from the menu below. Finally press Choose on the bottom right.

QT Quick Project QML

A new popup will appear:

kde create

Type a name and a valid path to save your project. Then press Next.  Select QT Quick 2.0 from the menu list. Press Next. Press Finish. Immediately a user interface defined in the QML language will appear.

qtquick2

Like all great programmers we are going to solve things the most lazy way possible.  Instead of typing all the QML code by hand we are going to press the Design button that is on the left of the screen.  A drag and drop screen should appear now.

QT draganddrop

We drag an image onto the area and select the source on the right. Save the project. Open a terminal and locate the qml file you just created. Alternatively you could simply copy the code in the edit box and save it to a .qml file. Enter the command:

This will display the windows as defined in the qml file without any functionality. It is simply a viewer for the interface.  We then create some code to load this QML definition:

Finally we modify the first line main.qml to:

Simply because our QtQuick was missing. Running

Will now display our user interface as defined by QML:

QML_PyQT

All of the code is simply PyQT, so you could add code like in the previous tutorial. These are the two methods to create a graphical interface with PyQT.  This method may be more loosely coupled to the code compared to the method of creating a GUI with QT in the previous tutorial. Despite that both are valid methods.

Building an application GUI with PyQT, beginners tutorial

Standard
QT_KDE_Dialog

In this tutorial we will teach you how to create a graphical application with PyQT.  You will need to install some packages:

If python-kde4 cannot be found update your repository to find it. If you are on Ubuntu use this link.

Now we can use the QT Designer application. It saves us from writing tons of layout code that you may be used to when writing HTML.  Start qt4-designer from your applications menu. The QT Designer application will appear:

QT_Designer

QT_Designer

Press Dialog without Buttons and press Create. You can now drag any component from the widget box to the form. Simple drag and drop. We added a button, label and a pixmap.  (I took a random image from the web for the pixmap)

QT_KDE_Dialog

Our window looks like the image above. Press Form > Viewcode. We will get a popup box with the form code in… C++! That is great, but we want the Python code.   Press File > Save as > form.ui.

The file test.ui contains your form described in XML format. (You can view it in a text editor) Open a console and type:

Running the file does nothing. Create a new file called  gui.py

Paste the code below:

Run with:

This will open our graphical interface. Pressing on the OK button will simply close the application.

PyQT window

We want to add some action when the OK button is pressed.  We add these three lines to the code:

Please make sure your button is named pushButton by inspecting the form.py file. Pressing the button will print ‘OK pressed’ to the terminal.

pyqt_window2

Total application below:

gui.py

form.py (generated):


Creating a gui in Python with WxWidgets [tutorial for beginners]

Standard
wxWidgets gui python

Python programming is a lot of fun and sometimes we want to create a graphical application (GUI). WxWidgets can be used to create a graphical interface that looks like a native application on any operating system. First download and install WxPython, the Python bindings for wxWidgets.

Then install a GUI creator called wxglade:

Using a GUI builder such as wxGlade will save you a lot of time, regardless of the GUI library you use. You can easily make complex graphical interfaces because you can simply drag and drop.

Creating our first GUI with Python and wxWidgets:

Start wxglade. You will see its user interface:

wxglade

Press on tiny window on the top left, below the file icon.

wxglade frame

Press OK.  An empty window will now appear.  Press on the tiny [OK] button in the wxGlade panel and press on the frame. The button will now appear. Press on Application in the tree window.

wxglade2

Set the output file in the wxproperties window.

wxglade3

If you look at the window note you can select multiple programming languages and two versions of wxWidgets. Select Python and wxWidgets 2.8.  Finally press Generate code. (Do NOT name the file wx.py because the import needs wx, save it as window.py or something else).

Putting it all together:
Run:

And a window with a button will appear. Pressing the button will not do anything. To start a function when pressing the button, we need to define a so called Callback. This can be as simple as:

Finally we bind the button to the callback function using:

Pressing the button will now write a message to the command line. Instead of the boring command line message, we want to show a message box. This can be done using this command:

The full code below:

wxWidgets gui python


An Introduction to Building Quantum Computing Applications with Python

Standard

So we want to make a quantum application with Python, but since we do not own any quantum computer we need to have a simulator first. Simulation will not have the same performance as an actual quantum computer but we will be able to run applications. We have a choice from three simulators:  PyQu , QuTip and Qitensor.  We decided to pick QuTip as it has a very large code base and as it has the most recent changes.  PyQu hasn’t been updated since 2010 and Qitensor since a year or so.

Installing
We use a Unix machine in this tutorial, but you should be fine with any other operating system. Install using:

We then start Python from the command line and type the commands listed below ( >>> ).

This indicates that Qutip has been correctly installed.

The Quantum data structure
In quantum systems we need a data structure that is capable of encapsulating the properties of a quantum operator and ket/bra vectors, we use the Qobj data structure for that. In other words, to effectively simulate a quantum application we need to use the appropriate data structure.  Consider the example below:

And execute with:

This will output the quantum object:

If you want to specify user input yourself you could use:

This quantum object will simply hold your user given data:

 Quantum states and operators
A quantum system is not a simple two-level system, it has multiple states.  QuTip includes some predefined states and quantum operators which are listed here.

Qubits and operators
We create a Qubit to hold data. Th Qubit is the quantum analogue of the classical bit. Unlike traditional bits, the qubit can be in a superposition of both states at the same time, a property which is fundamental to quantum computing. The code below will create a qubit:

You can now apply quantum system operators on the qubit:

Combining qubits
To describe the states of two coupled qubits we need to take the tensor product of the state vectors for each of the system components. Let us try that:

The output we will get is:

Whats next?
We have built some very simply quantum applications using this simple introduction. Perhaps you want to create an actually useful application, if so you could study more about quantum computing and complete the tutorial at http://qutip.org/docs/2.2.0/index.html

Building an IRC (ro)bot

Standard
irc chat

There are tons of (ro)bots out there for IRC (Internet Relay Chat). So how do you start and build one in Python, just for fun?

You will need a program that connects with an IRC server and acts like a traditional IRC client.  IRC servers never ask for any type of complicated human verification such as solving captchas, which is why we can simply connect with a script. The script itself will use network sockets,  a library that is often used to provide network interactions in many programming languages including Python and C/C++.

To communicate with an IRC server, you need to use the IRC protocol.  The IRC protocol has distinct messages such as PRIVMSG, USER, NICK and JOIN. If you are curious, you could read the entire protocol. But following this tutorial may be a lot simpler ;) Authentication is achieved using only a few steps:

The IRC protocol is a layer on top of the IP protocol.   To create a socket we use the command:

socket.AF_INET tells the library to use the network protocol IPv4.   The second argument tells the library to use stream sockets, which are traditionally implemented on the TCP protocol. (IRC works over TCP/IP). We then must use the commands to authenticate with the server:

Sometimes the IDENT command is neccesary too. Summing up, we get this class (save it as irc.py):

Now that we have the network connectivity class, we can use it as an instance.  We will keep our (ro)bot simple for explanatory purposes. The bot will reply “Hello!” if it gets the message “hello” in the channel it resides.

Save it as bot.py and run with python bot.py. Connect with a traditional irc client (mirc,hexchat,irsii) to the the channel and observe the experiment has worked! You can now extend it with any cool features you can imagine.

Creating a gmail wordcloud

Standard
gmail

I have created a python program that generates a wordcloud based on your gmail account. The output may look something like this depending on the contents of your emails:

gmail

First you will need a small script that interacts with the gmail service. We have created a small script that interact with gmail. It relies on gmaillib installed and you will need to set: allow “less-secure” applications to access gmail server:  https://www.google.com/settings/security/lesssecureapps

Gmail example:

If this script runs successfully you have almost all requirements installed. You will also need the library called wordcloud. We rebuild the system such that we get one long string containing the message bodies, which we feed as input to the wordcloud instance. The variable amount contains the number of mails to fetch. We have set it to 100 but you could set it to all messages using  get_inbox_count() or you could simply fetch all emails of the last week.

Final program:

Web